Halaman

    Social Items


The heritage of Cajun food history began as far back as the 1700s. The Indian natives and the Arcadians, an exiled group from Canada, began the rich history of the bayous and rural Southern Louisiana.

All of the settled immigrants including Germans, French, English, Creoles, Africans, and Mexicans all played a part in developing this full-bodied Cajun cuisine.

Creole people had a more aristocratic heritage from England and all but shut out those that did not share their birthright. The settlers found a new home in the prairies and bayous and became well versed in the art of survival.

Cajun food history came together as a varied way of living off the land. The more refined Creole peoples remained in the city and enjoyed a more rich and elegant menu of many choices. Cajun people were poor and made homes in rural areas and deep in the marsh and swamps of Louisiana.

Initially, Cajun food never inspired a second thought and was rather ordinary. Poor immigrants simply had to "make do" with the cheapest foods and had no access to complimentary spices.

As more settlers came to southern Louisiana, the immigrants melded together with each ethnicity lending their unique spirit and spices to their somewhat bland food and turned around their poorly defined menu into what became Cajun Food with a "kick."

A mixture of all ingredients in one pot became the staple of great Cajun food history. This flavorful type of cooking branched out into the southern states with each creating a new take on old recipes.

Settlers continued to move along throughout the south taking a piece of Cajun food history with them. Red beans and rice in Louisiana became peas and rice, or "hoppin john" in South Carolina while in Florida a different rendition of this dish became known as black beans and rice.

Many years later, derived from Cajun food history brought about new menus of "Southern Hospitality." The same main ingredients prepared in various ways.

Traditional Cajun food and recipes have been passed down and we continue to take pleasure in these "one pot" dishes melded with the goodness of Cajun food history.

A Short History of the Cajun People and Their Cuisine


I got the idea for our crispy burritos. I tweaked it to fit our family. We've made them several times now & changed one thing here or there. And they've been amazing every time. Hope you enjoy them, too.

This recipe made 12 burritos total. We made up as many as we needed the first day and then used the leftover ingredients for more the next day.

Ingredients:
Chicken, cooked & shredded (instructions below)
1 can Mexican RoTel (it has lime & cilantro)
1/2 pkg Taco Bell taco seasoning
1 pkg Knorr Rice Sides Spanish Rice
1 can black beans, drained and rinsed well
Uncooked tortillas, as many as you need for your family
Shredded cheese
Sour Cream
1 can Green Chile Enchilada Sauce
-----
Directions.........

In crockpot:
2 lbs chicken (I use mine from frozen)
1 can Mexican RoTel
A little water to cover the bottom of the crockpot

Cook on high for 3 hours.
Do not drain the juices. Push the rotel into the crockpot and remove chicken. Shred chicken with forks and return to crockpot. I always add about a 1/2 pkt of Taco Bell taco seasoning and stir until all the chicken is coated. Put the lid on and let the crockpot "keep it warm."

On the stovetop:
Cook 1 pkt of Knorr Rice Sides Spanish Rice according to pkg directions. Let sit when it is done. It's okay if it cools off a little.

On the griddle:
Heat griddle to 400. Cook tortillas according to pkg directions. It is usually about 30 seconds on each side. Ours are from Costco and are Tortilla Land brand. I can cook 2 at a time on our griddle. Don't turn off the griddle. You're going to use it soon to "crisp" the burritos. Keep it at 400 degrees.

Now it is time to build the burrito. Place the tortilla on a plate. Starting at the bottom of the tortilla, add:
spoonful of rice
spoonful of chicken
few dollops of sour cream
spoonful of black beans
Sprinkle with shredded cheese

Carefully wrap it up and place seam side down on the griddle. Once that side is "crisped," rotate to the back side, and continue with the remaining 2 sides.

I can do quite a few burritos at a time on the griddle. I just build the other burritos while the others are "crisping."

Serve hot with green chile sauce on the side. We use a spoon and drizzle it on!

I couldn't get a good picture of a cross section of these and didn't think about it until they had cooled off. But this gives you an idea....

Crispy Southwest Chicken Burrito


For the Dough:
3¼ cups all-purpose flour
½ cup yellow cornmeal
1½ teaspoons salt
2 teaspoons sugar
2¼ teaspoons instant yeast
1¼ cups water, room temperature
3 tablespoons unsalted butter, melted
4 tablespoons unsalted butter, softened
1 teaspoon + 4 tablespoons olive oil, divided

For the Sauce:
2 tablespoons unsalted butter
¼ cup grated onion
¼ teaspoon dried oregano
½ teaspoon salt
2 garlic cloves, minced
1 (28-ounce) can crushed tomatoes
¼ teaspoon sugar
2 tablespoons coarsely chopped fresh basil
1 tablespoon olive oil
Freshly ground black pepper

For the Toppings:
1 pound mozzarella cheese, shredded (about 4 cups)
(Pepperoni)
¼ cup grated Parmesan cheese


HOW TO MAKE IT

Make the Dough: Whisk together the flour, cornmeal, salt, sugar, and yeast in a large bowl.

Add water and melted butter and mix on low speed, using a dough hook, until fully combined, 1 to 2 minutes, scraping sides and bottom of bowl occasionally. Increase speed to medium and knead until the dough is glossy and smooth and pulls away from sides of the bowl, 4 to 5 minutes. (You can easily make this by hand, mixing in the water and butter with a spatula and then kneading by hand.)

Coat a large bowl with 1 teaspoon olive oil. Using a greased spatula, transfer the dough to the bowl, turning to coat the dough in oil; cover tightly with plastic wrap. Let rise at room temperature until nearly doubled in volume, 45 to 60 minutes.

Make the Sauce: While dough rises, heat the butter in a medium saucepan over medium heat until melted. Add onion, oregano, and salt; cook, stirring occasionally until liquid has evaporated and onion is golden brown, about 5 minutes. Add garlic and cook until fragrant, about 30 seconds.

Stir in tomatoes and sugar, increase heat to high, and bring to a simmer. Lower heat to medium-low and simmer until reduced to about 2½ cups, 25 to 30 minutes. Off the heat, stir in the basil and olive oil, then season with salt and pepper.

Laminate the Dough: Turn the dough out onto dry work surface and roll into a 15×12-inch rectangle. Using an offset spatula, spread the softened butter over the surface of the dough, leaving a ½-inch border along the edges. Starting at the short end, roll the dough into a tight cylinder. With seam side down, flatten the cylinder into an 18×4-inch rectangle.

Cut the rectangle in half crosswise. Working with one half, fold into thirds like a business letter; pinch seams together to form a ball. Repeat with the remaining half. Return balls to the oiled bowl, cover tightly with plastic wrap and let rise in refrigerator until nearly doubled in volume, 40 to 50 minutes. Meanwhile, adjust oven rack to lower position and preheat oven to 425 degrees F.

Bake the Pizzas: Coat two 9-inch round cake pans with 2 tablespoons of olive oil each.

Transfer 1 dough ball to dry work surface and roll out into a 13-inch circle. Transfer dough to the pan by rolling the dough loosely around a rolling pin and unrolling into the pan. Lightly press dough into the pan, working into corners and 1-inch upsides. If dough resists stretching, let it relax for 5 minutes before trying again. Repeat with remaining dough ball.

For each pizza, sprinkle 2 cups mozzarella evenly over the surface of the dough. (If you’re using any meat or veggie toppings, add them now, on top of the cheese.) Spread 1¼ cups tomato sauce over the cheese (or toppings) and sprinkle 2 tablespoons Parmesan over the sauce. Bake until crust is golden brown, 20 to 30 minutes. Remove pizza from the oven and let rest 10 minutes before slicing and serving.

HOMEMADE CHICAGO STYLE DEEP DISH PIZZA

Courtesy of Allrecipes.com
This recipe is very yummy and passed onto me from my Sister-in-Law Amy.

I don't do this recipe exactly like the website since it was too much for my family, so here is my version and you can put in the vegetables that you prefer. You could do this with a frozen bag of veggies... but fresh is SO much better!


Chicken and marinade
2 medium-large boneless skinless chicken breast halves
3 tablespoons cornstarch
2 tablespoons soy sauce
1/2 teaspoon ground ginger
1/4 teaspoon garlic powder

Other Ingredients
3 tablespoons cooking oil, divided
1 1/2-2 cups broccoli florets
1/2 c snow peas
10 asparagus with 2-3 inches of bottoms cut off
1/4 c onion sliced (I do mine big enough to find them and take them out for the kids)
1/4-1/2 cup thinly sliced carrots
1/2 cup water
1/2 teaspoon chicken bouillon granules
1 tablespoon Soy Sauce
1/4 teaspoon ginger
1/8 teaspoon garlic powder
1/2 teaspoon cornstarch

Directions

1.Cut chicken into 1/2-in. strips; place in a resealable plastic bag or bowl with lid. Add cornstarch and toss to coat. Combine soy sauce, ginger and garlic powder; add to bag (or bowl) and mix/shake well. Refrigerate for 30 minutes.

2.In a large skillet or wok, heat 2 tablespoons of oil; stir-fry chicken on a medium heat until no longer pink, about 3-5 minutes. Remove and keep warm. Don't be alarmed if the bottom is coated with the cornstarch and marinade... it will come off later and coat the veggies.

Add remaining oil; on medium heat, stir- fry broccoli, asparagus, carrots and onion for 4-5 minutes or until crisp-tender then add the pea pods because they cook faster than the other veggies. Mix water and bouillon and add to the veggies (this softens the buildup on the bottom of the pan and it thickens and coats the food). Reduce heat to medium low or low heat. Return chicken to pan. Mix the soy sauce, ginger, and garlic again with the cornstarch and pour over the chicken and veggies. Cook and stir until thickened and well coated. You can put the lid on to help your veggies to cook through a little bit more, you don't want them to be too limp, but not too crunchy either.

Serve over rice. *I like it with Brown Rice which you will need to start before you begin cooking the chicken since it takes 45 minutes to cook brown rice*
Note: I have tried it with bell peppers before and it was good, but I like this combo of veggies the best of all the ways I have tried it! The asparagus really is quite good for those of you that are hesitant... my kids LOVE LOVE LOVE it! Surprisingly enough! ;)

Chicken Stir Fry

1 lb chicken, cooked and shredded
15 oz can white navy beans
14.5 oz can fire roasted tomatoes
2 cups chicken broth
1/4 cup buffalo chicken wing sauce (Frank's Red Hot Wings Buffalo Sauce)
1 pkg dry Ranch dressing mix
1 cup frozen corn kernels (we like super sweet white frozen corn)
1/2 tsp onion powder
1/2 tsp garlic powder
1/2 tsp celery salt
1/2 tsp freeze dried cilantro (I've used finely chopped fresh with success as well)
1/4 tsp (optional to add at end if needed)
4oz to 8oz of cream cheese, softened to room temperature (do not use low fat, result is a grainy soup)
Bleu cheese crumbles, optional

1. Cook chicken
2. Simmer all ingredients except cream cheese for 30 minutes. Or 4-6 hours on low in crockpot.
3. Remove from heat and add cream cheese in small chunks.
4. Whisk carefully until smooth and serve with bleu cheese crumbles

More in depth instructions:
I like to use my crockpot to cook my chicken with a little chicken broth. I put all remaning ingredients, except cream cheese, in a bowl to combine with chicken later. I just keep it in the fridge until I'm ready. Makes it fast and easy! However, this is originally all done in the crockpot & you can do it that way as well. Your chicken just needs to be cooked first. A word of caution, if you don't like the "heat" from the buffalo sauce, start with 2 tbsp and then add in 1 tsp increments at the end to your desired heat. I've found 1/4 cup is just right for me and my family. The recipe originally called for 1/2 cup and that is a hold-onto-your-seat level of hot for our family. So, test it out and see what works best for you.

Once my chicken is cooked and shredded, I pour the ingredients from the bowl into a 3.5 quart pot and add the chicken. I bring it to a boil over medium high heat, then turn temperature to low and simmer for 30 minutes. (Note: if you do this in the crockpot, you can cook it on low for 4-6 hours.) Remove from heat and add the cream cheese in small clumps using a fork. Allow cream cheese to warm up in soup, then carefully whisk until the cream cheese is melted down and smooth. I used to use an entire package of cream cheese, but I've since found that about 6 oz is right. Perfect amount of creamy and buffalo heat. If you're trying to cut calories, just use 4 oz. However, the cream cheese tempers the buffalo sauce "heat." If some of your family likes it hotter than others, simply place the bottle of hot sauce on the table to add additional "heat."

Recipe adapted from crockpotgourmet.net. My changes include: chicken broth reduced from 4 cups to 2 cups, not draining the beans or tomatoes, reduced cream cheese, and optional salt.

This recipe makes about 12 cups. Nutritional facts per serving: Calories-163, Fat (g) 5.1, Carbs (g) 12.3, Protein (g) 15.6.

I could not get a picture of this because we would always forget! My family loves it. I barely remembered to get a picture until the bowl was almost gone. It isn't a flattering picture but I promise the picture doesn't do it justice. The chili/soup is delicious and I always get rave reviews when I share it with family and friends! Hope you enjoy!!!

Buffalo Chicken Chili


I got this recipe from my neighbor. She brought this stew over after I had my baby. It was so simple and delicious. We'll be making it again because my kids loved it! The other great thing was the veggies were in beautiful, big chunks but they were so tender and not crunchy or mushy like in most stews. The key is cooking them separately. Hope you enjoy this simple, yet full of flavor, stew.

from Jean

1 lb ground beef
1 onion, cut up
2 cups cubed potatoes
2 cups carrots, cut in thick circles
1 tsp salt
1/8 tsp thyme or oregano (we used thyme)
pepper to taste
1 tsp Worcestershire
1 can tomato soup
Reserved veggie water

Cook hamburger with salt, pepper, and thyme. (Keep hamburger kind of chunky.)
In separate pots, cook potatoes and carrots until almost done. (Cook the onions with the potatoes.)
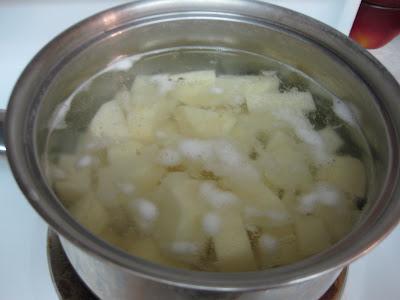
Reserve water from potatoes and carrots.
Add veggies, Worcestershire, tomato soup, and veggie water to hamburger. (You might not need all the veggie water. Add to desired broth consistency.) Simmer for 30 minutes until veggies are fully tender (but not mushy).Serve with breadsticks or saltines.

Simply Beef Stew


I originally found this recipe about 2 years ago and have loved it. It is perfect to take to family gatherings and there's almost never anything leftover. It's a great salad to take for funerals, too. My kids love it. I only changed 1 thing -leaving out the pineapple- from the original recipe, but left everything else. It is easy and always a crowd pleaser.

1 (6 oz.) orange Jell-o2 cups boiling water

1 cup mandarin orange and pineapple juice, reserved from the canned fruit

1 (6 oz) frozen orange juice concentrate

1 (3.4 oz) lemon pudding mix

1 (8 oz) carton of whipped topping

1 (20 oz)can pineapple tidbits, drained reserving juice (I don't use the pineapple, just the juice)

1 small can mandarin orange (I think these are like 8 or 10 oz), drained reserving juice
Mix boiling water and jello together for 2 minutes. Mix in frozen orange juice concentrate until dissolved. Mix in reserved 1 cup mandarin orange and pineapple juice. Add fruit. (If you don't include the pineapple like I do, you can use 2 cans of mandarin oranges so there are more oranges. I prefer to just use the pineapple in something else & take the juice and only use 1 can of oranges. I've never had any complaints.)
Put in a 9 x 13 dish and refrigerate until set. So that the oranges are well distributed throughout the salad, I carefully take a spoon and arrange the oranges in the pan. I usually do this while it is sitting in the fridge. Otherwise, when you move it from the counter to the fridge, all your "hard work" is out the window. ;)

Make pudding according to package directions. Pour over set jello and refrigerate for 5 min.

Drop whipped topping in several mounds on top of pudding layer and carefully spread. Look at those beautiful layers!

Note: I usually make this a day ahead. However, I do the jello part the night before and let it set up overnight. I also make the pudding and put it in a bowl. The morning of, I just take a paper towel and dab any water droplets from the jello if there is any. Then, just before I take it, I put all the layers together. It has seemed to be the most smooth process for transport and freshness.

Sunshine Jello Salad

From Becki

I received this recipe from a friend and neighbor in my community. It looked different and delicious!

1 lb Italian sausage, browned and drained
1 jar pasta sauce
3/4 cup water
1 box penne pasta, cooked and drained
1 tbs garlic powder
1 tbs basil
1/2 tsp pepper
1/2 cup shredded parmesan cheese
2 roma tomatoes, sliced
8 slices frozen garlic bread
2 cups shredded mozzarella cheese

Mix cooked sausage, cooked pasta, pasta sauce, water, garlic powder, pepper, basil and parmesan cheese in a large bowl. Toss lightly. Pour into greased 9 x 13 pan. Place garlic bread slices on top of mixture. Cover with shredded mozzarella. Dip 8 slices of Roma tomatoes in olive oil, and place one slice on each bread slice. Bake uncovered in 400 degree oven for 15 - 20 minutes. Let set for 10 mins before serving.

Baked Ziti

These sugar cookies are a deli-style sugar cookie. More like what you'd get from subway or someplace like that. They're not a Valentine or Christmas cookie style sugar cookie. These are great when you've got a craving for sugar cookies because they whip up fast and they make about 2 dozen perfectly every time. I can't remember where I got the recipe years ago, but it is quick and easy and they always turn out great and soft!
2 3/4 cups all-purpose flour
1 tsp baking soda
1/2 tsp baking powder
1 cup butter, rooom temperature
1 1/2 cups white sugar
1 egg
1 tsp vanilla extract

1. Preheat to 375 degrees. In a small bowl, stir together flour, baking soda, and baking powder. Set aside.

2. In a large bowl, cream together the butter and sugar until smooth. Beat in egg and vanilla. Gradually blend in the dry ingredients. Roll rounded teaspoonfuls of dough into balls, and place onto ungreased cookie sheets. I like to push down just slightly on the top of the dough ball with my palm so they cook flatter for speading frosting later.

3. Bake 8-9. Don't overcook! Let stand on cookie sheet 2 minutes before removing to cool on wire racks. Cool completely and frost as desired.

Easy Sugar Cookies

This is a re-post of a much much older post. I finally took a picture of it. It is difficult to get a good picture of any casserole, but oh-well. The taste is great. It is an all-in-one dish meal & always a kid and husband favorite. We're not huge casserole fans, but on busy nights, this dish is easy to throw together.

from a cookbook at a bed & breakfast in Utah

1 bg frozen hashbrowns
1 lb browned hamburger
1 can corn
1 can cream of chicken soup
1 can cream of mushroom soup
½ cup sour cream
½ pkg Lipton Onion Soup
Shredded Cheddar Cheese

Put about 1” of hashbrowns in bottom of greased 9 x 13 casserole dish. You can do more. I’ve just found that 1” to 1 ½” works well. That way the layers are even. Brown hamburger with Lipton Onion Soup and a dash of pepper. Layer hamburger on top of hashbrowns. Add corn. Combine soups & sour cream. Pour over corn. Sprinkle with cheese. Cover with foil. Bake at 350º for 45 to 60 min. Let sit a few minutes before serving.

Lo-fat tip: Use ground turkey and yogurt sour cream.

Hashbrown Pie


Disclaimer: I know I've previously posted a recipe with this same title. In practically EVERY case, I have made every recipe on this site. On occasion, I get one from someone and assume it is good. I received this recipe and it wasn't exactly as I would have liked or imagined. I have a wonderful peanut butter ball recipe (which came from my mother-in-law) that I use for making Christmas candy each year. So I put it to use and the result was fabulous. For that reason, I am reposting this as my own version.... which I of course feel is much better. The peanut butter is extremely smooth and super delicious!
Makes about 60 bites or so depending on the size you roll the balls.

Filling ingredients:
2 cups powdered sugar
1 1/2 cups peanut butter
3 tbsp softened butter (not margarine)
Waffle shaped pretzels (squares or rounds)
Melting chocolate
Directions:
Put filling ingredients in a bowl and mix until well combined and smooth. (Sorry about the picture. Had to use an old camera for it since my other one was charging!)
The result will be a semi-stiff, but still soft dough. Should not stick to your hands. If it does, add a tiny bit of powdered sugar. (Again, sorry for the bad picture.)Roll into balls. Not too big. About 3/4 of an inch or a little less. (Yeah, battery finally charged! Boy there is sure a difference.)Put between pretzels to make a sandwich.Put in freezer for about an hour or until firm.

Get chocolate ready for dipping.
Dip each "bite" only half way into the chocolate and set on wax paper to set up. Keep in fridge until ready to serve.

I think these would be fun to dip in white chocolate colored for the holidays. There are many possibilities!

Chocolate Dipped Peanut Butter Pretzel Bites


I first saw this recipe on Real Mom Kitchen's blog. She found it on Picky Palate. My family loves this chicken. I had to reduce the Frank's hot sauce to 2 tbsp for my small children. (Three tbsp to 1/4 cup is just right for my husband and I.) After making it several times, I realized I hadn't posted it to our recipe blog. And since this blog is used as a portable recipe box for family and friends, it needs to be on here. Hope you enjoy it as much as we do.

14+ thawed boneless skinless chicken tenders (you can use breasts, they just take longer to cook)
2 Tbsp - 1/4 cup Frank’s Red Hot Sauce
3/4 cup of your favorite BBQ sauce
4 Tbsp melted butter
2 Tbsp Worcestershire sauce

Place all ingredients in a large Ziploc bag and marinate for one to two hours.If you are not grilling these outside, HI broil works great, too. Line a cookie sheet with foil. Place cooling racks over the foil. Place chicken across the racks. DISCARD the marinade!Broil chicken for about 5 or 6 minutes on each side, turn over and repeat. The tenders cook fast so this can be done in about 10 minutes.Super simple. Super fast. My kind of dinner!

Firehouse BBQ Grilled Chicken

1 lb ground beef
1 onion, diced (as fine as you prefer)
2 cloves finely minced
1-2 cups* cooked long grain rice (not instant), *see note below
4 cups beef broth (I like Pacific beef broth in the box)
2 cans Campbell’s Beef Consommé
2 14.5 oz cans diced tomatoes, undrained
2-4 green bell peppers**, chopped (I like mine cut small), **see note below
1/4 cup brown sugar
2 tsp salt
1 tsp pepper 
1 Tbsp Worcestershire sauce, plus a small dash

Cook long grain rice according to package directions. In a large pot (at least 3.5 qt size), brown hamburger with onion and garlic until beef is no longer pink. Drain any grease from hamburger mixture. Add beef broth, beef consommé, tomatoes, green peppers, brown sugar, salt, pepper, Worcestershire and rice. Turn heat up to medium high and bring to a boil. Reduce heat to low, cover with lid, and simmer for 35-45 minutes.

Serve with saltine crackers. This soup gets even better the next day and makes great leftovers.

*Note: I prefer only 1 cup of rice because I like more broth in my soup and, if there are leftovers, the rice soaks up plenty of the broth. If you like your soup less "brothy," then use two cups of rice. The result will be a slightly thicker soup and that is still delicious

**Note: The original recipe calls for 2 green peppers. I have since used several different kinds of peppers with great results. I love the look and taste of the green peppers. Orange and yellow are equally as pretty and tasteful. So I began using two green peppers, 1 orange pepper, and one yellow pepper (or just two orange or two yellow). I always dice my peppers very small so it wasn't overly pepper-y. It has been delicious with 4 peppers each time and I will probably continue to do it this way from now on.

Variation: When serving, sprinkle freshly grated Parmesan cheese and serve with breadsticks.

Recipe adapted quite a bit from sixsistersstuff.com

Changes made:
8 cups beef broth—I use 4 cups plus 2 beef consommé (much better flavor!)
2 lbs ground beef—1 lb was plenty for my taste
2 cups rice - I use only 1 cup rice to have more broth
2 peppers - I use 4 peppers (combining green with orange/yellow peppers)
1 Tbsp Worcestershire - I like to add one extra splash ;)

Stuffed Pepper Soup


Tips:
A friend told me she used her Bosch instead of a pastry cutter for the flour/shortening/butter mixture. OH MY GOSH! LOVE THIS! Used it today and made 6 crusts in less than 15 minutes. I love my pastry cutter. I'll save it for other recipes, but when I make pie crust, I make a ton so that I have them in the freezer for recipes to come. So, here's what you do: Simply put your shortening and/or butter in your mixer. Add your sifted (important) dry ingredients into the mixer. Using your whisk attachment, pulse the mixture briefly until you get the pea size chunks desired. Boom, you're done. Pour it into a bowl and add your wet ingredients, stir just until they're wet and you're all done. SUPER easy! You can get a lot of pie crust made doing it this way. I did a triple recipe and probably could have done a 4x recipe. It was so fast and easy!! Making my holiday pie making faster and easier. And into the freezer they go. Did you know cold pie crust is the best way to make pie? Your crust will be flakier & it's easier to work with and roll out. Good luck with all your pie making this Thanksgiving week!

3 cups all-purpose flour, plus more for dusting
1 teaspoon salt
1 1/2 sticks cold butter
3/4 cup vegetable shortening
1 egg
5 tablespoons cold water
1 tablespoon distilled white vinegar
Combine the flour and salt in a large bowl. Add in the butter and shortening. Using a pastry cutter, gradually work the butter and shortening into the flour until the mixture resembles tiny pebbles. This step should take 3 or 4 minutes.

Lightly beat the egg with a fork, and then add it to the mixture. Next, add in the cold water and vinegar. Stir the mixture together until it's just combined, and then remove half the dough from the bowl. Yield: dough for 2 crusts. I usually make 3x or 4x batches at a time!

If making a regular recipe, divide the dough into 2 parts. Put each ball into a freezer bag and seal tightly. Press down on the dough, keeping it about 1 1/2 inches thick. Place in freezer. If using soon, keep the pie crust in the freezer for at least 30 min before using. Remove and roll out quickly and get it into the oven with your pie!

If you are making a large batch, divide the dough into  equal parts. A quadruple batch would make 8 crusts, a triple would make 6. Follow the same instructions as above. When ready to use, remove the crusts and place them on the counter for 20-30 min before you need them. DO NOT thaw in the microwave! Roll out as usual for any crust needs!

For rolling out, use a small amount of flour for dusting on each side. Roll out to desired thick/thin-ness. Tip, roll your dough up around your pin and then unroll onto your pie dish to avoid cracking or tearing when transferring!

Bake according to the instructions for your specific recipe: pot pie, pumpkin pie, apple pie... etc. If baking shell first for a chocolate or cream pie, bake at 375* for 15-20 min until golden brown. For any recipe, you may need to put foil around the edges to avoid over browning.

EASY & FLAKY Pie Crust


This is an update from an older post. Each time I made this, I found I was making the same adjustments. It was time to update the blog to reflect that. I love this recipe and always have lots of compliments when I've taken it to people.

2 lbs chicken, cooked & cut up
I prefer to cook my chicken in the crockpot with 1 cup water & 2 tsp chicken bouillon & sprinkle with pepper.

Once chicken is cooked, in a large pot combine:
2 quarts chicken broth, I use Pacific organic chicken broth
1 quart water
1+ cup chicken juices leftover from crockpot (I usually use all that is leftover)
1/4 cup chicken soup base
1 large family size cream of chicken soup (26oz)
1 regular can cream of chicken soup (10 3/4 oz)
2 tsp dried minced onion
3+ carrots, grated
pinch of dried minced garlic
Dash of pepper
Very small dash of celery salt (my kids won't eat celery!)

1 24oz bag Reames frozen noodles (or use your own homemade noodles)
Start cooking the noodles in their own pot of water.Important: I usually sprinkle just a little bit of chicken bouillon in it to give them some flavor. Cook noodles until half done. These noodles take a bit to cook but I've fooled many people into thinking they're homemade... so it's worth the time to let them cook. (I've never mastered the whole homemade noodle thing, so I leave the work to Reames. However, my sister makes my mom's homemade noodle recipe all the time. Click here if you want authentic homemade noodles.) 

Meanwhile, put water, chicken bouillon granules, chicken soup base, cream of chicken soup, minced onion, and pinch of minced garlic in a large pot.I prefer to cook it on medium to help start the flavors to mix together. I use a whisk to make sure the soup mixes into the broth well. Once it is slightly boiling, grate carrots into the pot. These add great flavor and texture. And my kids eat the soup better if they are grated and not chopped. Plus, they cook faster that way. Allow the soup to continue a medium boil.

Once the noodles are almost done, throw them in the broth and let them finish cooking and absorb the flavor. The broth will also thicken from the starch of the noodles. Keep the soup at a rolling boil, being sure to stir often so the noodles aren't sticking to the bottom.Finally, add chicken. Add a dash of pepper for taste. I usually taste test along the way just to be sure it doesn't need a little more chicken soup base or bouillon. The cream of chicken soup usually does a great job of adding great flavor while still keeping the broth very chicken-noodle-like. I let it cook just a couple minutes past the noodles being done to be sure the chicken has absorbed lots of flavor from the broth.
After the noodles are done and it has passed a couple of taste tests, serve up with your favorite roll, breadsticks, or just a simple side salad! I promise you won't be disappointed. It's hard to mess this soup up.
It makes a big batch. Perfect for making some for your family & taking some to the neighbors or someone who just needs homemade chicken noodle soup in their life! :) This soup is also amazing served over homemade mashed potatoes! Oh heaven!!!

Chicken Noodle Soup

 This was Olive Garden worthy!!! (in my opinion!!)
I sort of mixed things up on a Lasagna Roll Up recipe... I had the Idea from the Chicken Lasagna... but it really is nothing like it! Try it and you will see!! I found the recipe for the Alfredo sauce here on foodnetwork.com and the way to cook the chicken also... from there it just became what it is.

The Chicken:
2 large *thaw* chicken breasts sliced (fajita style)
2 *fresh* cloves garlic, minced
1 T Olive Oil
1 1/2 C. FRESH Spinach leaves
Heat oil in pan with garlic until the aroma builds... Do not burn or over brown. Cook until chicken is fully cooked then add the Spinach and stir until the leaves are wilted into it.

The Sauce
:
4T Butter
1 clove fresh garlic, minced
2T flour
2 C Cream
1/2 C. milk
1C Fresh grated parmesan

In a medium sauce pan heat butter and garlic and add flour once butter is melted and aroma of garlic is building. Add the Cream and milk and stir then add the parmesan and bring to a boil and continue to stir frequently over a medium low heat as it boils and thickens. (I added a dash of pepper to it as well)

The Pasta/Filling:
24 oz (1LB 8oz) cottage cheese
1 egg
1/4 C Parmesan cheese
Mozzarella cheese
Parsley
salt and pepper
9 lasagna noodles cooked al dente

Mix the cottage cheese, egg, parmesan, mozzarella, and a dash of salt and pepper and Parsley til it looks good. Spoon on the cooked noodles and roll up and place in 9X13 pan with a little sauce spread on the bottom. **You will have left over filling but only 9 rollups fit in the pan**

Mix some sauce into the chicken... just enough to spoon on top of each roll up (you will have left over sauce I still had about a 1/2 cup or just a little more left over) and then top with a little more parmesan and mozzarella cheese and diced tomatoes for color (I added the tomatoes after the picture was taken)

Cook in oven at 350 degrees for 20-30 minutes. Until Cheese is starting to golden and sauce is bubbling.

Let sit for 10 minutes after removal from the oven. Serve and Enjoy!

Chicken Alfredo Lasagna Roll Ups


I am reposting the recipe because it has been on the blog for over 2 years and I took some new pictures. Plus, I've found making individual pot pies rather than 1 big one helps them cook better.


Crust:
Click here for the recipe. I just used the dough from a previous batch and let them thaw all day to room temperature.

Roll out one crust and place it in the bottom of 9 inch pie dish. Roll out top crust and leave until your filling is done.

Chicken:
2 chicken breasts, thawed
Salt and pepper

Place chicken in glass baking dish and sprinkle with salt & pepper. Cover with foil. Bake chicken at 350 for about 40-45 minutes or until done. Cut up all veggies while chicken is cooking. After chicken is done, put chicken on cutting board to cool. After it is cooled, cut up into desired chunks. (Note: I've found that baking the chicken keeps it much more moist than boiling it. If you don't care, then just boil it or for even quicker cooking time, cook it in a George Foreman grill and sprinkle with the salt & pepper. This takes about 15 minutes but it's a little crisper on the edges.)

Filling:
1 1/2 cups water
1 1/2 Tbsp chicken soup base
1 cup potatoes, cubed to desired size
1/3 cup carrots, chopped to desired size
3 Tbsp celery, chopped into itty bitty pieces
A couple shakes of dried minced onion

Individual foil pie dishes
(Recipe makes 5)

Boil all veggies until they are still firm, but close to done. If needed, add more water if the veggies are absorbing a lot of the water. Add 3 Tbsp to 1/4 cup cream of chicken soup. Add more chicken soup base if needed to taste. Add salt -if needed- and pepper to taste. Stir in until blended, with a taste check afterward, of course! :) (If you want your pie more runny/juicy add a little extra soup/water.) Let cool slightly. Add in chicken and pour into pie dishes. I buy the foil individual pie dishes. They come in a pack of 6. I just reuse them and wash them in the dishwasher! Super easy. The pies cook better as individual rather than one big one.

Put top crust on top and flute the edges. With a sharp knife, cut about 4 slits in the center to let steam escape.


Bake at 425 for 15 minutes. Lower oven temperature to 350 and cook for an additional 10 minutes or less... just until golden brown. (I got mine a little too golden this time... as you can see in the picture.) Maybe a little foil around the edges? I've done that for other pies, so I guess it would work for this, too.
Let set up for about 5 minutes and then serve.
Note: You could do other veggies if desired. I'm not a pea or green bean person so I opted for potatoes, celery, and carrots. If you do peas, cook them separately and throw them in at the end with the chicken. I guess you could do frozen veggies, but I've found that fresh tastes soooooo much better. It's worth all the effort to cut it all up and have it taste so yummy.

Chicken Pot Pie


I FINALLY got a picture of this yummy cake. So this is a re-post of an older post. The picture doesn't do it justice. I have take this cake to MANY a community/school/family function and have yet to not be asked for the recipe. It's that good. It is so simple. Totally my style!

from Aunt Lettie
-this was a family staple at family reunions and many family gatherings... so yummy

3/4 cup oil
4 eggs
3/4 cup water
1 small pkg (3 oz) lemon jell-o

Blend in blender. Add yellow cake mix. (Lemon can be used if desired). Blend until mixed well. Pour into greased/floured 9x13 pan. Bake for 30 minutes at 350. Poke cake all over with fork while cake is still hot.

Mix 1/2 cup lemon juice (I just use the ReaLemon concentrated stuff) and 2 cups powdered sugar. If you want your cake less juicy, half the lemon juice and powdered sugar. Pour over cake. And let cake cool completely.
It was near impossible to get a good picture of this cake. It is good the first day, but the second day, it is AWESOME!

Aunt Lettie Lemon Cake

from Mom

2 lbs hamburger
2 1/2 Tbsp + 1/2 tsp brown sugar
1 cup ketchup
8 oz tomato sauce
1 cup water
1 Tbsp Worcestershire
1 Tbsp white vinegar
1 Tbsp minced onions
1/4 tsp mustard
2 -3 bay leaves

Brown hamburger and drain. Add all ingredients and simmer until desired consistency. Remove bay leaves before serving. Serve on toasted buns.

Note: The recipe above is for a half recipe. (Sometimes I even do a half of a half!) A full recipe calls for 4 lbs hamburger, 1/3 cup brown sugar, 2 cups ketchup, 16 oz tomato sauce, 2 cups water, 2 Tbsp Worcestershire, 2 Tbsp white vinegar, 2 Tbsp minced onions, 1/2 tsp mustard, 5 bay leaves. My mom prefers to make a whole batch and freeze the rest. It freezes really well.

Lo-fat tip: Use ground turkey in place of the hamburger.

A Family Favorite: Sloppy Joes

I only call this soup a chowder because it has a light, thin broth similar to clam chowder. Whatever you decide to call it: it's DELICIOUS. Besides, "Hamburger Veggie Soup" just doesn't sound as good. ;) You can make this with breakfast sausage or hamburger. We've made it both ways and our family seems to like hamburger better. We've also found we really like red potatoes in it. Brown russet potatoes work well, too. It's just a feel good soup in which we never have any leftovers.

[Read all of recipe before beginning ;)]

Ingredients:
5 cups chicken broth (see note)
2 cups carrots, diced small
1 celery rib, diced very small
5 red or brown potatoes, diced small
1/2 cup finely chopped onions
3-4 cloves garlic, pressed in garlic press
1 lb hamburger (or sausage or half a pound of each, we prefer hamburger but both are great)
1 12oz can evaporated milk
2 Tbsp broth (from soup -see instructions)
1 Tbsp cornstarch

Note about broth: I've found we really like the Knorr Chicken Flavor Bouillon in the mexican aisle
If you choose to do the bouillon, we do 1 Tbsp for every cup of water. Feel free to adjust this to your own tastes. Place water in a bowl with bouillon and warm it up in the microwave for about 2-3 minutes. Stir until bouillon is mixed well.

Directions:
Into a 3.5 quart pot, add broth, carrots, celery, and potatoes.
Cook all veggies in chicken broth until potatoes are about half done. I do a taste check at this point. I usually add some pepper, but rarely any salt.

While you are simultaneously cooking the veggies, in a 3 quart pan, cook the hamburger, onions, and garlic. I VERY lightly salt my hamburger and sprinkle some pepper over it. Brown it until done. I like to break my hamburger up so it is fine. It is a soup that you want to get a little of everything in every bite. I don't like any of the hamburger or veggies being too big.

Remove any grease from the hamburger. Add this to the veggies when the potatoes are half done. Allow to simmer until veggies are VERY close to done. When the veggies are tender, add evaporated milk and stir. You can serve it at this point. OR, if you want it just slightly thicker, you can remove 2 Tbsp of broth to a small bowl and stir in 1 Tbsp of cornstarch. Stir until smooth and then add back into the soup. Do one last taste test and serve.

We love this soup with biscuits or breadsticks or even just saltines. So delicious and just warms you right up! Simple and delicious!

Hamburger Potato Chowder